


Itinerary
- Day 1
Kathmandu
Kathmandu- Start point
- Tribhuvan International Airport (KTM) त्रिभुवन विमानस्थल, त्रिभुवन विमानस्थल, Kathmandu, Bagmati, Nepal (We will pick you up from Kathmandu Airport)
- Meals
- Breakfast
- Day 2
Kathmandu
Kathmandu- Meals
- Breakfast
Included Activities
- Guided tour of Thamel tourist area
- Visit Pashupatinath Temple
- Visit Bouddhanath Stupa
- Visit Swayambhu Stupa (Monkey Temple)
- Visit Kathmandu Durbar Square
Optional Activities
- Equipment rental or purchase at Thamel
Landmarks Pashupatinath Temple Bouddhanath Stupa Swayambhu Stupa Kathmandu Durbar Square Thamel - Day 3
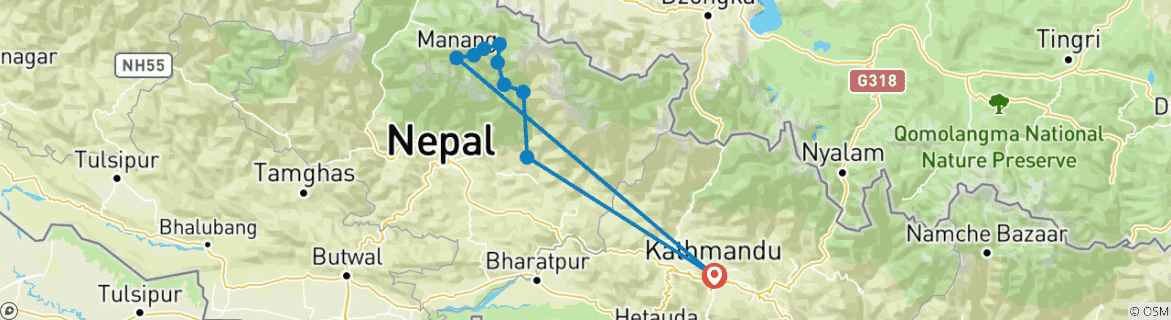
Kathmandu to Besishahar to Dharapani
Kathmandu to Besishahar to Dharapani - Day 4
Dharapani to Koto
Dharapani to Koto- Meals
- Breakfast, Lunch, Dinner
Included Activities
- Trek from Dharapani through Bagarchhap
- Trek through pine and fir forests
- Trek to Timang
- Trek to Latamarang
- Trek through jungle to Koto village
- Views of Annapurna II
Landmarks Annapurna II - Day 5
Koto to Meta
Koto to Meta- Meals
- Breakfast, Lunch (Packed lunch), Dinner
Included Activities
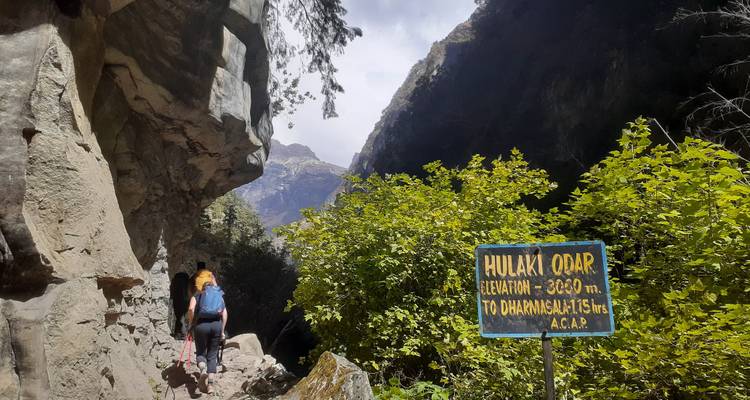
- Police Check Post permit registration
- Trek along Soti Khola
- Trek through pine forest
- Cross suspension bridges
- Trek to Meta village
- Views of Annapurna II and Lamjung Himal
Landmarks Annapurna II Lamjung Himal - Day 6
Meta to Phu
Meta to Phu- Meals
- Breakfast, Lunch, Dinner
Included Activities
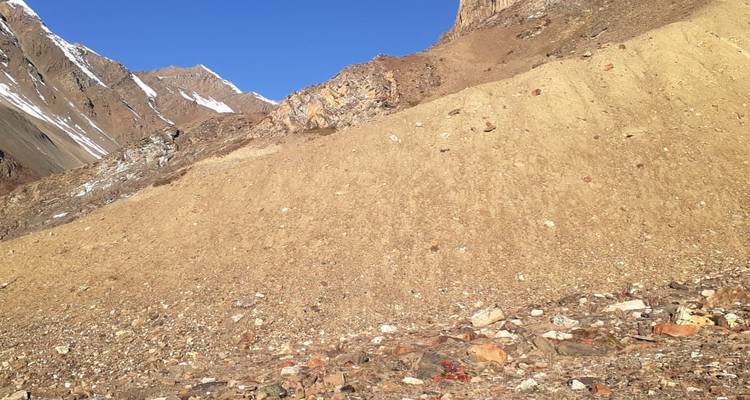
- Trek with suspension bridges
- Trek to Kyang
- Trek through Phu Khola
- Views of Amotsang Himal, Kangaroo Mountain, and Pokharkan
Landmarks Amotsang Himal Pokharkan - Day 7
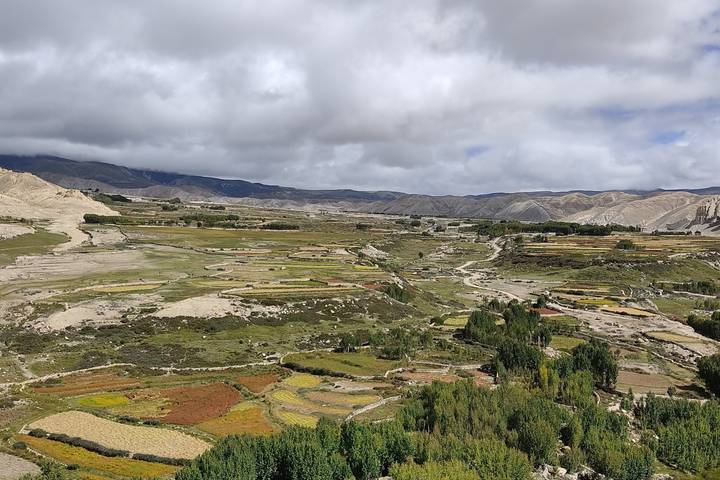
Phu Gaon
Phu Gaon- Meals
- Breakfast, Lunch, Dinner
Included Activities
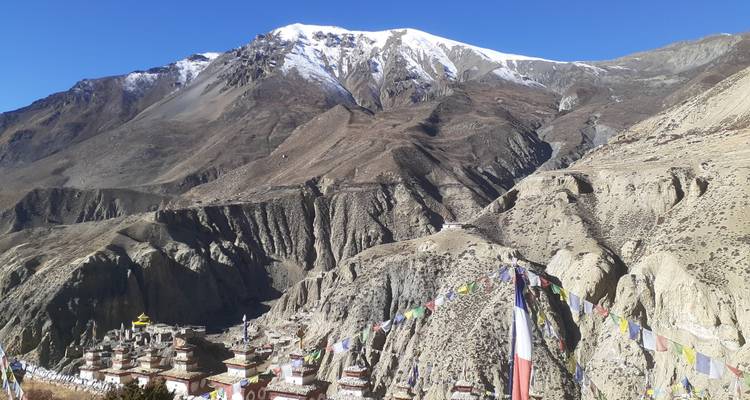
- Acclimatization rest day
- Explore Lost/Hidden Valley
- Cultural interaction with local ethnic groups
- Visit historic monastery
Landmarks Lost/Hidden Valley - Day 8
Phu to Nar
Phu to Nar- Meals
- Breakfast, Lunch, Dinner
Included Activities
- Trek with suspension bridges and streams
- Trek to Mahendra Pul bridge
- Trek past Buddhist stupas
- Trek to Nar village
Landmarks Mahendra Pul - Day 9
Nar to Nagwal
Nar to Nagwal- Meals
- Breakfast, Lunch, Dinner
Included Activities
- Trek to Kangla Pass
- Views of Annapurna cordillera
- Trek descent to Nagwal
Landmarks Kangla Pass 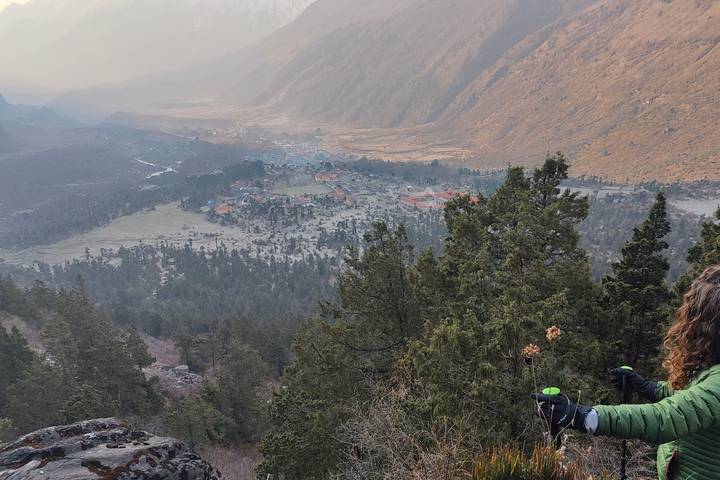
- Day 10
Nagwal to Manang
Nagwal to Manang- Meals
- Breakfast, Lunch, Dinner
Included Activities
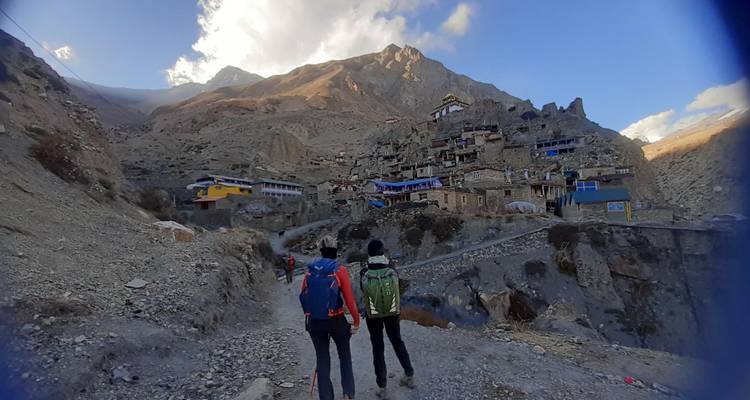
- Trek through Manang Valley
- Trek through pine forest
- Visit Braga monasteries
- Views of Annapurna II, Annapurna III, Pisang Peak, Gangapurna, and Gandharva Chuli
Landmarks Annapurna II Annapurna III Pisang Peak Gangapurna Braga 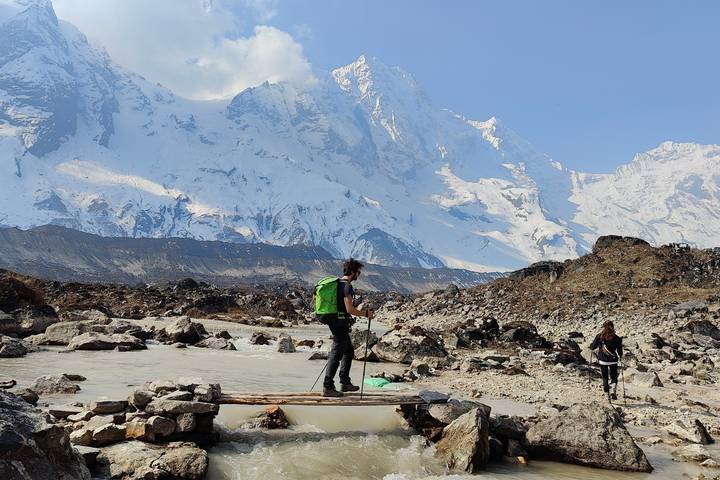
- Day 11
Manang to Kathmandu
Manang to Kathmandu- End point
- Tribhuvan International Airport (KTM) त्रिभुवन विमानस्थल, त्रिभुवन विमानस्थल, Kathmandu, Bagmati, Nepal (After the trip, we will drop you to the airport)


